Quick Fixes for 'Windows Can't Connect to the Printer' Problem

Quick Fixes for ‘Windows Can’t Connect to the Printer’ Problem
When you are trying to add a network shared printer, if you receive message “Windows cannot connect to the printer.”(commonly occur to Windows 7), you must be very frustrated. But don’t worry. You can use solutions in this post to fix the problem. Each solution has been reported to be useful. So try all of them until you have the problem fixed.
The error would appear with a specific error code like 0x0000007e. The most common error codes are as follows:
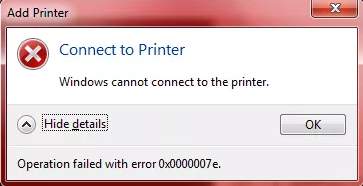
Windows Cannot Connect to the Printer – Operation Failed with Error 0x0000007e
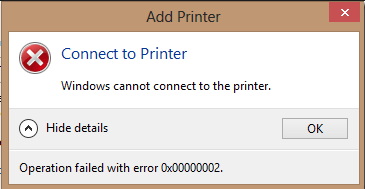
Windows Cannot Connect to the Printer – Operation Failed with Error 0x00000002
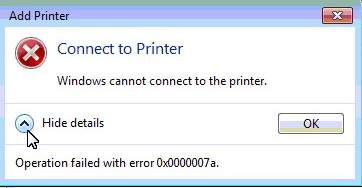
Windows Cannot Connect to the Printer – Operation Failed with Error 0x0000007a
Solution 1: Restart Print Spooler Service
Solution 2: Create a New Local Port
Solution 3: Delete Printer Drivers
Solution 4: Copy “mscms.dll” Manually
Solution 5: Delete a Subkey
Solution 1: Restart Print Spooler Service
Follow steps below to stop Print Spooler service then start it again.
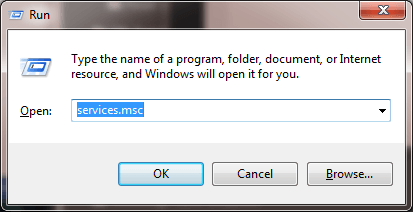
1. PressWin+R (Windows logo key and R key) at the same time. A Run dialog box will open.
2. Type services.msc in the run box and clickOK button.
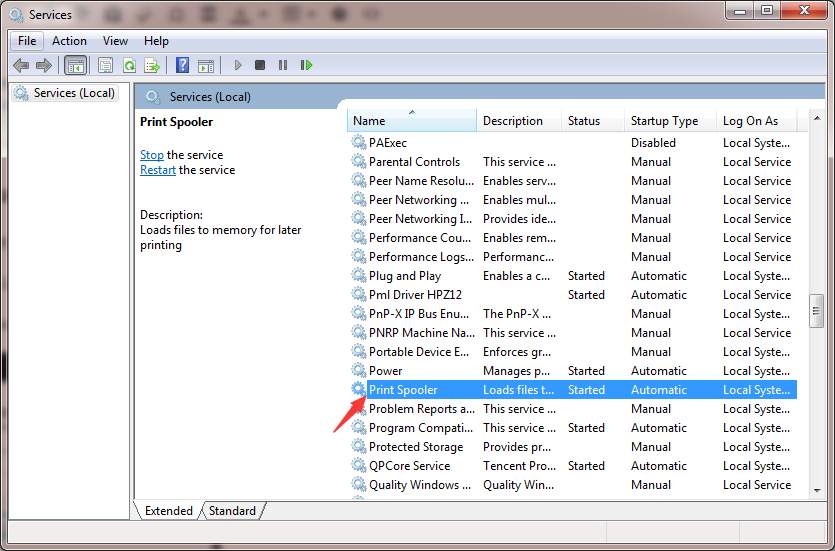
3. In theName list, locate and double-click on service Print Spooler .
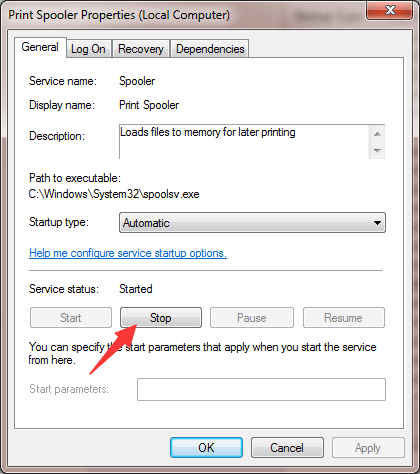
3. Under Service status, clickStop button.
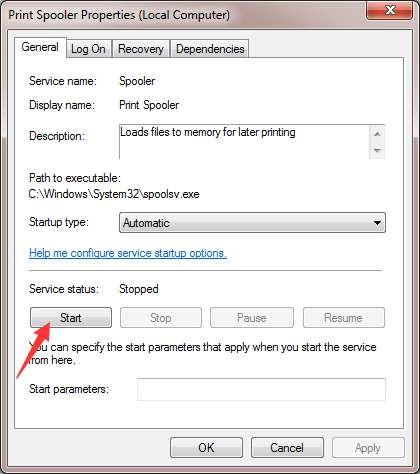
4. ClickStart button to start the service again.
5. ClickOK button.
After that, add the printer again and see if the problem persists.
Solution 2: Create a New Local Port
Follow these steps:
1. OpenControl Panel .
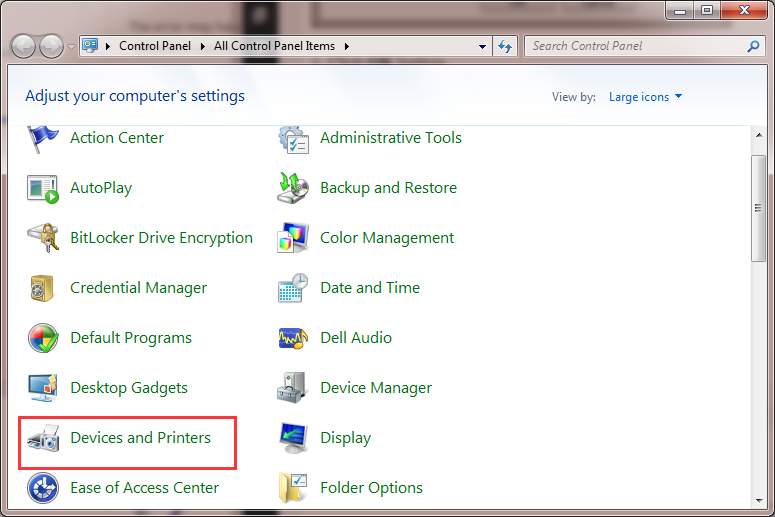
2. View by Large icons, clickDevices and Printers .
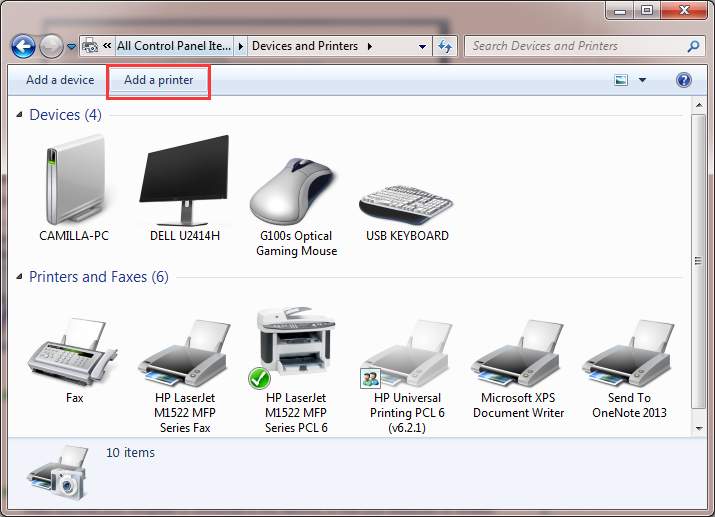
3. ClickAdd a printer at the top of the window.Note: To continue, you need to login to the computer as an administrator.
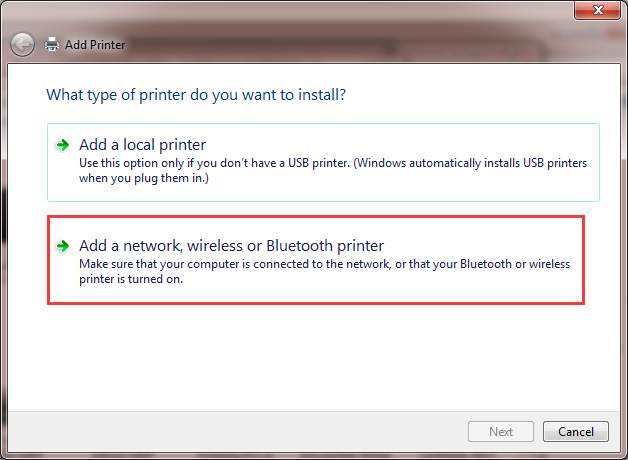
4. SelectAdd a network, wireless or Bluetooth printer .
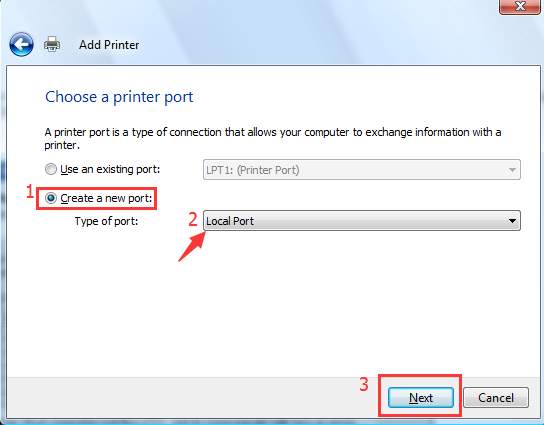
5. SelectCreate a new port , change the “Type of port” toLocal Port then clickNext button.
6.Enter a port name in the box. The port name is the printer’s address. The address format is \\IP address or the Computer Name\Printer’s Name (refer to the following screen). Then clickOK button.

7. Select theprinter model from the directory and clickNext button.
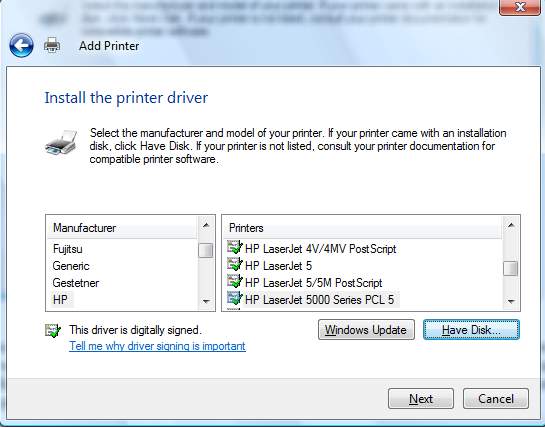
8. Follow the rest on-screen instructions to finish adding the printer.
Solution 3: Delete Printer Drivers
The problem can be caused by printer drivers. So you can try to remove the drivers and install them again.
Follow steps below:
1. PressWin+R (Windows logo key and R key) at the same time. A Run dialog box will open.
2. Type printmanagement.msc in the run box and clickOK button.
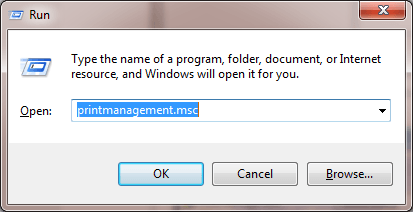
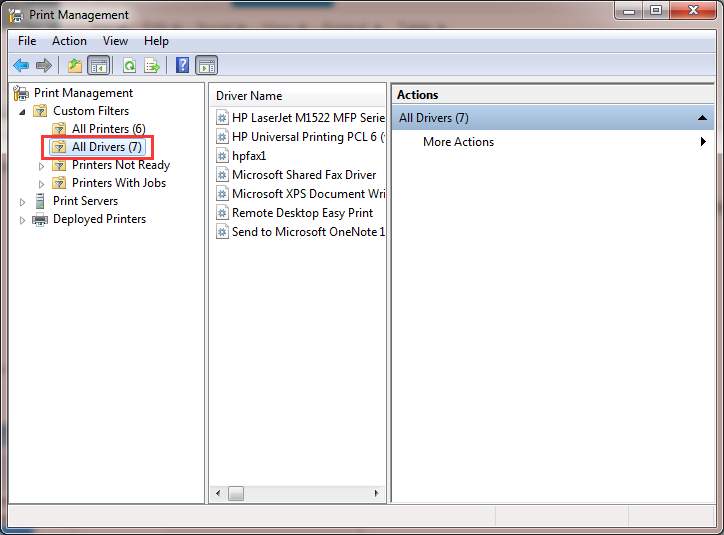
3. In the left pane, clickAll Drivers .
4. In the right pane, right-click on the printer driver and clickDelete on the pop-up menu.
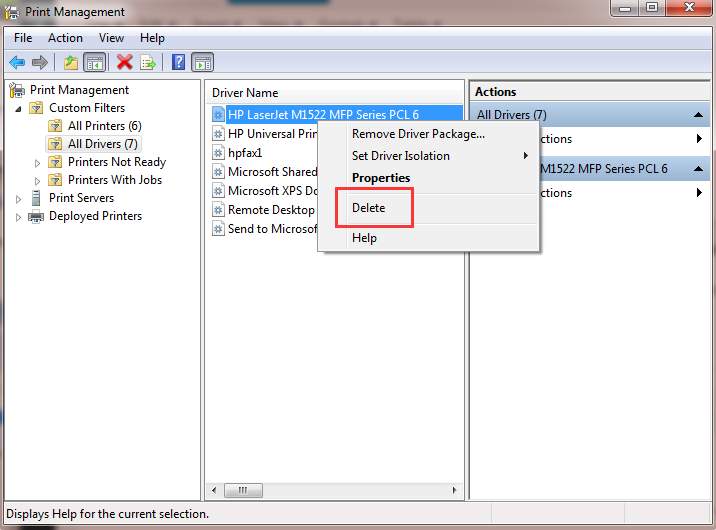
If you see more than one printer driver names, repeat steps above to remove them one by one.
5. Add the printer again.
If the problem persists, you may want to install the driver manually. You can download and install the driver from the printer manufacturer’s website.
If you have difficulty downloading the driver manually, you can use Driver Easy to help you. Driver Easy can scan your computer to detect all problem drivers then provide you with new drivers instantly. Download its Free version to have a try . If you find it helpful, you can consider upgrading to the Pro version. The Pro version allows you to update all drivers with just one-click.
Solution 4: Copy “mscms.dll” Manually
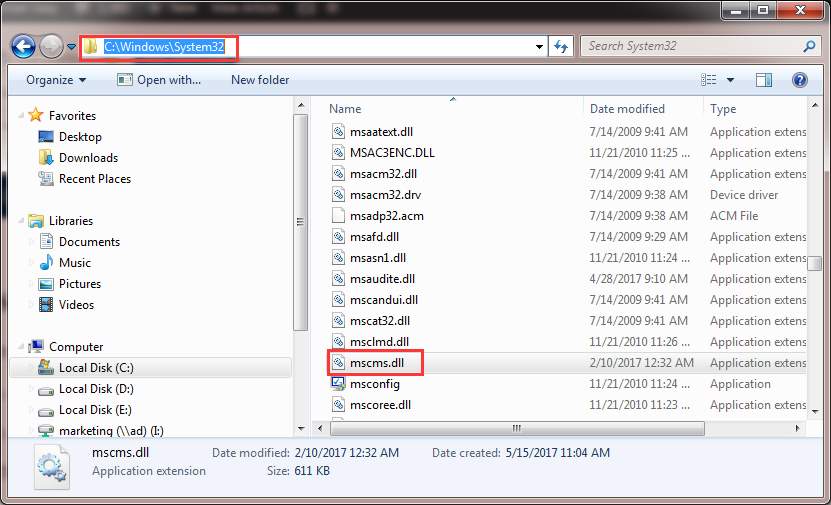
1. OpenC:\Windows\system32 and find the file “mscms.dll “.
2. Copy the file to the following path:
C:\windows\system32\spool\drivers\x64\3\ if you are using 64-bit windows
C:\windows\system32\spool\drivers\w32x86\3\ if you are using 32-bit windows
If you have no idea which version of Windows you are using, seeHow to Get Operating System Version .
3. Try to connect to the printer again.
Solution 5: Delete a Subkey
Modifying registry keys incorrectly may cause serious system problems. So before you get started, it is recommended that youback up the registry key so you can restore it in case any problems occurs.
1. Stop Print Spooler service. (refer steps in Solution 1 to stop the service)
2. PressWin + R (Windows logo key and R key) at the same time. A Run dialog box will open.
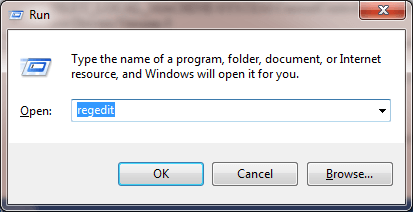
3. Type regedit in the run box and clickOK button.
4. Expand HKEY_LOCAL_MACHINE\SOFTWARE\Microsoft\Windows NT\CurrentVersion\Print\Providers\Client Side Rendering Print Provider . Right-click on Client Side Rendering Print Provider and selectDelete.
5. Start the Print Spooler service.
6. Reboot your computer and try to add the printer again.
Hope the solutions here will help you fix the printer not connecting issue.
Also read:
- Cure Print Issues with Windows 11 Advice
- Get Started with OpenAI's Newest Offering: The Personalized GPT Hub - Secure Your Spot Today
- How to Simulate GPS Movement in AR games On Honor 100 Pro? | Dr.fone
- In-Depth Analysis of Pioneer BDR-XS06 Blu-Ray Writer: Assessing Its Performance & Portability Features
- Recover iPhone 6s Data From iOS iCloud | Dr.fone
- Resolved Installation for New Printer Model
- Resolved: Post-Upgrade, PC Printer Won't Print
- Steps to Correct HP Printer's OXC4EB827F Issue
- Stop Discord Automatic Loading on PC Boot-Up
- Updated Best Image to Video Converters Free and Paid Options
- USB Printing Issues Post-Suspend with Win7
- Title: Quick Fixes for 'Windows Can't Connect to the Printer' Problem
- Author: Thomas
- Created at : 2025-02-16 19:20:04
- Updated at : 2025-02-20 02:50:38
- Link: https://printer-issues.techidaily.com/quick-fixes-for-windows-cant-connect-to-the-printer-problem/
- License: This work is licensed under CC BY-NC-SA 4.0.